.jpg)
Flushing your water heater tank is a crucial maintenance task that can significantly improve its efficiency and lifespan. By regularly flushing your water heater, you remove sediment buildup, which can cause the unit to work harder and use more energy, leading to higher utility bills and potential damage over time. As a homeowner, this procedure not only ensures a steady supply of hot water but also helps prevent costly repairs.
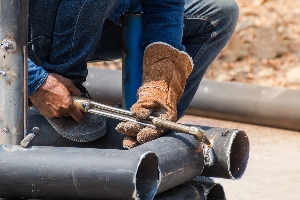
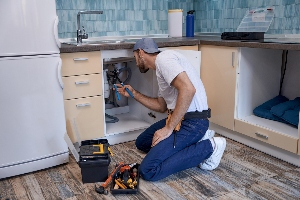
Our team at One Call Plumbing is dedicated to providing you with top-notch plumbing services in Greenville and Spartanburg. As licensed, bonded, and insured experts, we specialize in repairs, installations, and maintenance to keep your water heater running smoothly. Whether you're facing issues with sediment buildup or need comprehensive water heater maintenance, we've got you covered.
Preparing to Flush Your Water Heater
Flushing your water heater tank involves several key steps, including ensuring your safety, gathering the necessary tools, and correctly shutting off the power source. Proper preparation helps ensure a smooth and effective process.
Safety Precautions
Before starting, safety is paramount. Working with water heaters involves risks, especially when dealing with high temperatures and electricity or gas. Ensure the area around the water heater is clear of any flammable materials. Wear protective gloves and eyewear to prevent burns from hot water.
Make sure to handle power sources carefully. If you have an electric water heater, avoid any contact with water while working to prevent electric shock. For gas water heaters, ensure the gas supply valve is closed to avoid leaks. If you're ever unsure, it may be best to consult with professionals.
Required Tools and Materials
Having the right tools and materials on hand is crucial. You'll need a garden hose to drain the water, a bucket to catch any spills, and a wrench to disconnect any fittings.
Here's a list of what you'll need:
- Garden hose
- Bucket
- Adjustable wrench
- Screwdriver
- Protective gloves and eyewear
For electric water heaters, include a multimeter to check for any residual electricity. For gas water heaters, ensure you have tools to turn off the gas supply valve. Our licensed and bonded professionals always come prepared with all necessary equipment, guaranteeing a thorough and safe job.
Shutting Off Power Source
Turn off the power source before you begin. For an electric water heater, go to your breaker box or fuse box and switch off the circuit supplying electricity to the heater. Confirm that the unit is off using a multimeter for added safety.
For a gas water heater, locate the gas supply valve and turn it off. Ensure the pilot light is extinguished, and there is no gas flow. If you need assistance,
Preparation is key to safely and efficiently flushing your water heater tank. Following these steps will ensure the process runs smoothly, and consulting with our professional plumbing services can provide added peace of mind.
Steps to Drain and Flush the Tank
Regularly draining and flushing your water heater can enhance performance and extend its lifespan. This process helps eliminate sediment buildup that can cause inefficiencies and potential damage.
Draining the Water Heater
To begin, turn off the power supply to the water heater. For electric heaters, switch off the circuit breaker, and for gas heaters, set the gas valve to "pilot." Next, shut off the cold water supply to the tank and attach a garden hose to the drain valve at the bottom of the tank. Place the other end of the hose into a floor drain, bucket, or outside where water can safely flow out.
Open a hot water faucet in your home to allow air into the tank, which helps the water to drain more smoothly. Carefully open the pressure-relief valve to release pressure within the tank. Then open the drain valve and allow the tank to empty completely. If the water drains slowly or not at all, it may indicate a clogged drain valve due to sediment buildup.
Flushing Out Sediment
Once the tank is empty, turn on the cold water supply briefly to flush out any remaining sediment. This step is crucial to remove debris that can damage your water heater. Allow the cold water to flow through the tank via the open drain valve until the water runs clear. This process may need to be repeated a few times to ensure that all sediment is adequately flushed out.
During flushing, pay attention to the color and clarity of the water. Cloudy water with particles signifies sediment presence, whereas clear water indicates a successful flush. Flushing helps maintain the efficiency of your water heater and prevents potential issues.
Inspecting for Issues
After flushing, inspect your water heater for any signs of damage or leaks. Check the drain valve, garden hose connection, and pressure-relief valve for any water leakage. Inspect the tank itself for rust, corrosion, or any unusual signs that could indicate the need for repairs or replacement. Ensure all connections are secure before refilling the tank. Replace any damaged components as needed.
Refilling and Restarting the Heater
Refilling your water heater tank and getting it back to working condition involves carefully closing the drain valve and restoring the power or gas supply. Follow these steps to ensure a smooth and safe process.
Closing the Drain Valve
First, make sure the drain valve is tightly closed to prevent any water leaks. Use a wrench or pliers if necessary, but be careful not to overtighten.
Next, open the cold water valve to allow fresh water to flow into the tank. Monitor the water level inside the tank through the pressure relief valve until the tank is full. This step might take a few minutes, so be patient.
Check for any leaks around the drain valve and cold water supply connections. If you notice any leaks, tighten the connections as needed.
Restoring Power and Gas Supply
Once the tank is full, it's time to restore the power source or gas supply. For electric water heaters, turn on the circuit breaker connected to the water heater. Ensure the thermostat is set to your desired temperature.
For gas water heaters, open the gas supply valve and follow the manufacturer’s instructions to relight the pilot light. Typically, this involves setting the gas control valve to the "Pilot" position and pressing the ignition button.
After relighting the pilot light, set the thermostat to the appropriate temperature. Monitor the water heater for a few minutes to ensure it's operating correctly and safely.
Our team at One Call Plumbing can assist you with any issues that arise during this process.
Post-Flush Maintenance and Considerations
After flushing your water heater, it is essential to ensure the system is functioning correctly. Key steps include checking for any leaks, assessing performance, and scheduling future maintenance.
Checking for Leaks and Issues
Inspect the water heater and surrounding area for any signs of leaking. Pay close attention to connections and the base of the tank. If you notice any water pooling:
- Tighten any loose connections.
- Look for worn-out seals or gaskets.
- Observe for any odd noises that may indicate internal issues.
If uncertain or if the issue persists, contact licensed experts to diagnose and fix leaks efficiently, ensuring the longevity of your system and preventing water damage.
Assessing Water Heater Performance
Verify that your water heater is performing optimally by checking the water temperature. Open a hot water faucet and compare it to the original setting:
- Ensure consistency in water temperature.
- Listen for unusual noises during operation.
- Monitor water quality for any discoloration or sediment.
A change in performance can signal underlying problems.
Scheduling Next Maintenance
Regular maintenance is crucial for extending the lifespan of your water heater. Scheduling your next service is simple:
- Mark your calendar for an annual check-up.
- Keep a record of past maintenance activities.
- Opt for professional help from our team to handle future flushes and inspections.